
There is no uniform regulation as to exactly what a risk assessment must look like. This is ultimately left to anyone who has to prepare a GBU. Which, admittedly, does not make it any easier.
Our concern is if you, as the person responsible, already have the main work to provide you with one (or more) template(s) which is (are) as simple and self-explanatory as possible.

A certain trend that seems to be establishing itself more and more is the traffic light model with the colours green, yellow and red. After all, most questions about possible hazards cannot simply be answered with yes or no, since these answers do not yet contain any evaluation or even measures.
The use of the traffic light model is based on the risk matrix when assessing the hazard (hence the name... ). Green means everything good, yellow means yes, but... and red consequently this is not possible at all!
Tick the appropriate box in the GBU and at the same time you have already carried out an assessment of the risk and determine whether and, if so, which measures are to be taken to enable further work.
The new traffic light model is currently available for hazard assessments on maternity protection in the office and laboratory, scientific and technical areas and sports sciences.
In the medium term we also want to convert all other GBUs to this scheme, but it will take some time...

The GBU header contains the topic and work area to which the document belongs. Below this is either the general part or the personalized part. More about this.
On the first page you will find detailed instructions on how to complete the form and how to understand the colours of the traffic light model.
The document is divided into 2 sections, a general section and a personalized section.
- General part: Here, possible hazards during activities and in work spaces are identified as a preventive measure, irrespective of whether a pregnancy already exists or is known. The contents of these GBUs are regularly published in the working group / department.
- Personalised part: If potential hazards have arisen in the general part and if an employee is directly affected, these concrete hazards are summarised here and the corresponding protective measures or activity restrictions for this person(s) are defined.
This classification has the advantage that the general part can be used as a basis for all employees.
In the right column you can check GREEN, YELLOW or RED boxes (just click in the box to place or remove a cross). Mark only one colour at a time!

The risk is (very) low (or does not exist at all)
Tick green if the hazard does not apply or applies, but to such an extent that no health consequences are to be expected.

The risk is medium -> protective measures are necessary.
Mark with a yellow cross if the hazard applies, but specific protective measures make it possible to continue working on this activity / at the workplace.
The indications marked with a yellow square already contain suggestions for measures. Adopt them or provide additional information of your own.

The risk is high -> Employees must not be employed in this activity/job.
Mark with a red cross if the hazard applies and no protective measures are available to enable continued employment with this activity / at this workplace.

The personalised part is intended for certain persons who are exposed to certain (but possibly not all) risks as a result of their activities. The advantage of this part is that if there are few or no hazards for this person because he or she does not come into contact with the hazards found in the general part, the individualised GBU remains very short. You can also give the person a copy of this part, so that he or she has his or her own version for information or documents.
If you have only checked GREEN, everything is fine and your employee can continue working without restrictions. Please tick the green box in Table 1 of the summary.
If you have ticked YELLOW or RED, a hazard is to be assumed. Please enter the number, the activity and, in the case of yellow, the corresponding measure in Table 2 of the summary and, in the case of red, the excluded activity(s) in Table 3.


Let us assume that you prepare a risk assessment in accordance with the Maternity Protection Act because you learned of the pregnancy of one of your employees, namely for an office workplace.
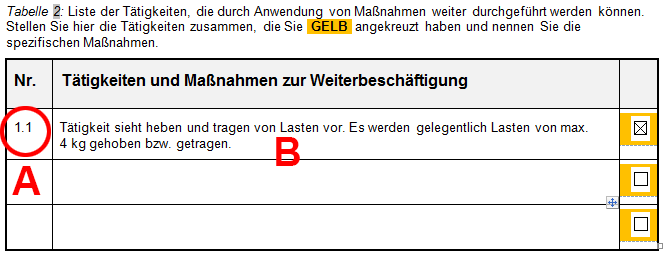
Enter your field of expertise (but not the name of your employee) in the field marked A as shown in the illustration.
The structure is structured according to hazard factors. This GBU begins with physical hazards. The first question deals with the lifting and carrying of loads (B). Your employee's job is actually to go to the basement quite often and fetch new boxes of printing paper, climb several floors of stairs and then walk into the office. The carton weighs more than 10 kg.
According to the Maternity Protection Act, pregnant women may only occasionally carry loads of less than 10 kg. They want to take this into account, but do not want to rule out the possibility that the employee will fetch paper. Green is therefore out of the question. Red also because nobody else can do the work. They tick yellow (C) and stipulate as a measure that the employee should only fetch 1 or 2 packs of paper occasionally and not carton by carton for all to stock.
None of the other questions have resulted in a hazard.
Now you can dedicate yourself to the personalized part and transfer the found hazard with number 1.1 to the table with the yellow fields as shown in the illustration under A. The following questions can be answered by clicking on the "Transfer" button. These are the activities that can continue to be carried out in compliance with certain measures. In our case, enter that the activity provides for the occasional carrying of loads, but not often and always less than 4 kg (B).
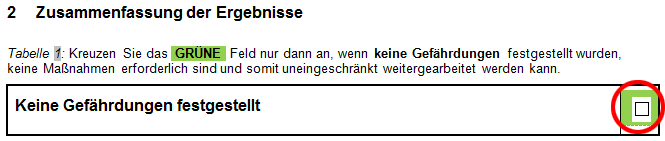
If no hazards have arisen, tick Table 1 with the green box in the summary in the personalized part. That would of course be very gratifying...
Accordingly, of course, enter the activities that you have marked red with the respective number in Table 3 of the excluded activities.
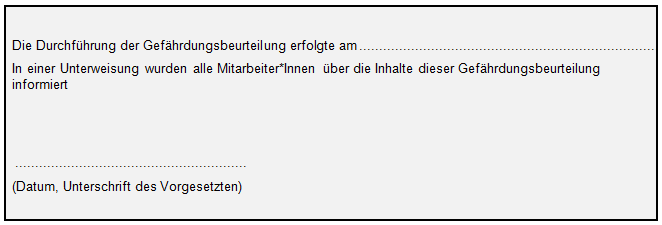
At the end, fill in the fields highlighted in grey. At the end of the general part simply enter the date and your signature. This is important so that the time of the creation is documented and of course by whom.
Since the GBU may serve as a basis for all employees for a long time, it should not be too old.
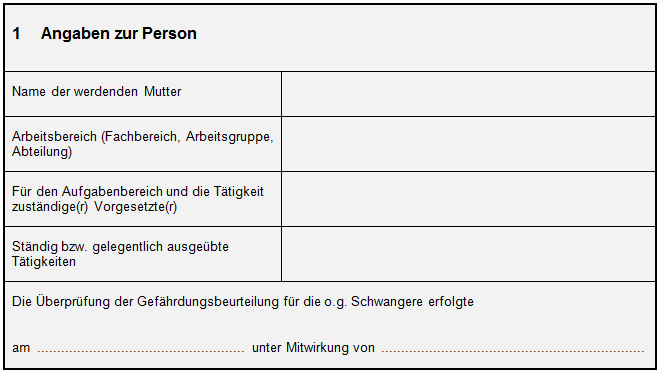
In the personalised section, you fill in the personal data of the employee(s) concerned and at the end there is a field where you have the persons who participated in the creation signed.
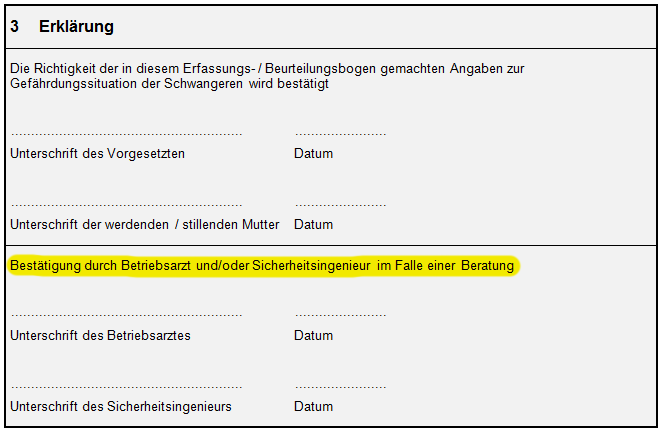
Finally, have the company doctor and / or the safety engineers sign the form. However, only if you have taken advantage of their advice. This is not obligatory. But advisable.
Keep the risk assessment in a safe place; it is needed more often than you think. Make a copy of the personalised part for your employees* and hand it over.
That's it!
If you have any questions or suggestions about this method, please do not hesitate to contact us.